a few weeks back, i was hosting a mini Rock Band jamfest/party and had the whammy bar on one of my Rock Band guitars break. it was still useable but would not reset back to the original spot.
so, being the DIYer i am, i decided this last weekend that i would fix it myself and thus avoid having to wait who-knows-how-long to get back my guitar from Harmonix. here is a basic guide on what you need to do (its not very scary or hard, only requires a screw driver and some macgyver skills). Keep reading to see the details.
1. Unscrew all of the screws on the back of the guitar; only need to remove the ones on the bottom half where the strummer and whammy bar are. I believe there are about 12 of them.
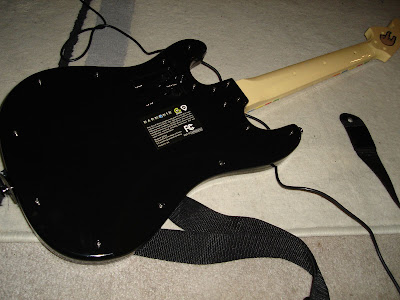
2. Remove the bottom; be sure to remember which screw went where to make things easier putting back together. You'll notice that a cable that connects the battery/power to the main board of the controller; gently unplug that from the main piece.
3. Now, you should be able to see the guts of your guitar (and realize how cheaply made they are too.. hehe..)

4. On the bottom area, you'll see a spring (or in my case, a broken one). The sprint connects to your whammy bar and the housing making it return back to its resting position. I just had to stretch the spring a little and reconnect it and voila! working whammy bar!


5. Now once your done fixing that spring, you can also check out a few of the other pieces like the strummer/flicker. I noticed that the inside of my guitar had TONS of glue webs all over and a few were even around the strummer area; i removed some of the webs that didn't hold anything in place.
Finally, just put your guitar back together and DO NOT forget to hook up the power cable we unhooked in step 2; i did that the first time and kicked myself for forgetting since i had to unscrew all of the screws again.
Hopefully your back up and rocking in no time!
No comments:
Post a Comment